Administration & Security

Organization & Settings

View source ↗

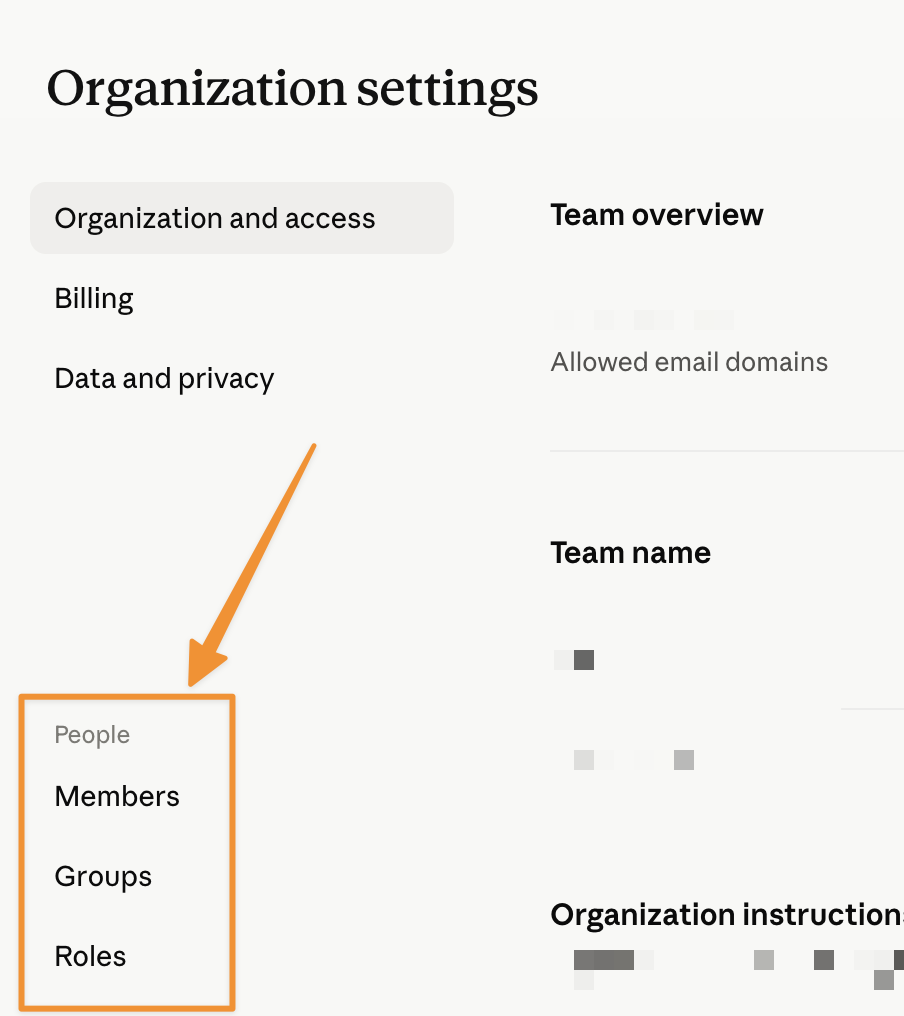
All organization-level configuration for Claude Enterprise lives in Organization settings (the gear icon or initial letter in the bottom-left corner). The table below is a quick orientation map for Bluemarq admins — each item has its own detailed article elsewhere in this document.

AreaWhat it controls
Organization / GeneralOrganization name, organization instructions, default model, support contact information.
MembersInvite/remove members, assign roles, export member list as CSV; Admins can manage this, but only Owner/Primary Owner can access Billing.
Roles & GroupsDefault roles (Primary Owner, Owner, Admin, User) and custom roles on Enterprise, assigned by group; see the separate Roles & Permissions section.
BillingPayment method, number of seats, invoices — accessible only to Owner/Primary Owner.
Data & PrivacyCustom data retention period (minimum 30 days) and audit log export (most recent 180 days).
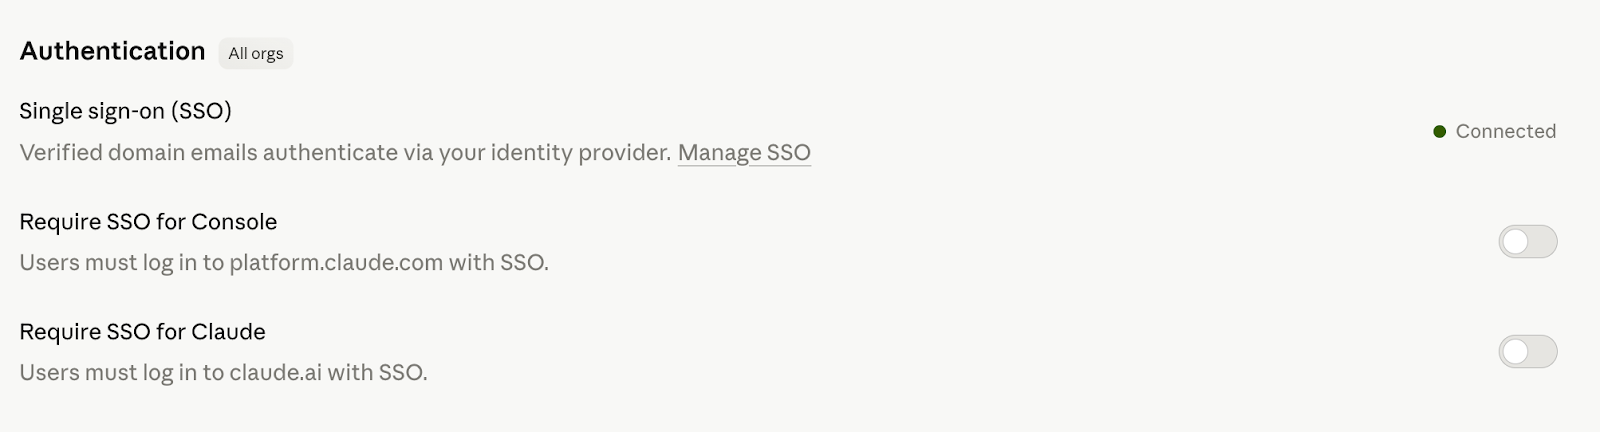
Authentication / SSOSSO configuration (Okta, Entra ID, etc.), JIT or SCIM provisioning.
Capabilities / IntegrationsEnable/disable features at the organization level (Claude Design, connectors, Claude in Chrome, etc.) before assigning permissions by role.
Organization and accessList of verified domains, enable/disable organization discovery.
Analytics / UsageUsage metrics by member/group; Enterprise Admins can see all metrics except Spend.

Claude Enterprise follows an "enable at the organization level first, then scope with custom roles" model: a feature (e.g. Claude Design, a connector) must be enabled in Organization settings > Capabilities before it can be assigned to individual groups via a custom role. If the organization-level switch is off, no one can access it regardless of what their role allows. Permissions are additive: a member belonging to multiple groups receives the union of all granted permissions.
Organization discovery (under Organization and access) lets colleagues with an email on a matching verified domain find and request to join the organization at sign-up, instead of creating separate individual accounts. Admins choose one of two modes: auto-approve (members join immediately, seats expand and are billed automatically) or manual approval (admin approves each request, billed upon approval). This feature is off by default on Enterprise and unavailable if SSO is already enabled.

For organizations with a parent/child structure: SSO/SCIM configuration and groups are managed centrally at the parent organization level and shared across all child orgs; whereas role assignment and spend limits by group are configured independently at each child org — changes in one child do not affect other children. When SCIM is resynced at one child, the resync will cascade to every other child org under the same parent.

Recommendation for Bluemarq Group: if Bluemarq has multiple legal entities/subsidiaries sharing a common identity provider (IdP) but needing separate roles or usage budgets, consider a parent/child organization model — register SSO/SCIM once at the parent level, then create a separate child org for each unit to assign roles and spend limits independently. If Bluemarq is currently a single legal entity with 25 seats, a parent/child setup is not necessary; only implement it once there are two or more legal organizations/IdP tenants requiring separated administrative control.

Source: Roles and permissions, Find and join a Team or Enterprise organization, How SCIM sync works for Enterprise organizations, Set up role-based permissions on Enterprise plans
↑ Back to top

Roles and Permissions

View source ↗

A member's permissions on Claude Team or Enterprise depend entirely on the role assigned to them.

Note on Primary Owner:

  • Each Team/Enterprise organization has only one Primary Owner.
  • The Primary Owner seat counts toward the plan's license count.
  • The Primary Owner can be a service account, not necessarily tied to a specific individual.
  • You can check who the current Primary Owner is at Settings > Account.

Four built-in roles:

RoleDescription
Primary OwnerA single person with full control over everything, including granting/revoking Owner permissions for others.
OwnerFull permissions like Primary Owner, except managing the Primary Owner role.
AdminInvite/remove members, manage SSO, audit logs, integrations, view usage analytics — but cannot grant/revoke Owner permissions or access billing.
UserRegular member, uses only day-to-day chat/projects.

Detailed permissions table by functional area:

FunctionUserAdminOwnerPrimary Owner
View/pay invoices✅✅
Add/edit payment method✅✅
Purchase additional seats✅
Create/edit chats, use projects✅✅✅✅
Enable integrations (native/custom), capabilities, public projects✅✅
Invite new members✅✅✅
Remove members / cancel invitations✅✅✅
Invite/remove other Admins, Owners✅✅
Manage SSO/authentication, audit logs, data retention (Enterprise)✅✅
View usage analytics (Team)✅✅
View usage analytics (Enterprise)✅✅✅

About Custom Roles (Enterprise plan only): Enterprise supports custom roles, which allow feature access to be controlled at the group level. A member set to the "Custom" role has no default permissions — their permissions are determined entirely by the custom roles assigned to their group(s). See details in section 3 below.

↑ Back to top

Setting Up Role-Based Permissions (Enterprise)

View source ↗

This is an advanced feature available only on the Enterprise plan, providing more granular feature-access control than the 4 default roles.

Four common design patterns:

  • Base + additive roles (recommended for most organizations): create a foundational "Standard Access" role for everyone, then add supplementary roles (e.g. "Cowork Enabled") that only add extra features for certain people. Permissions are additive, without conflicts.
  • Tier-based roles: divided by level — "Full Access", "Standard Access", "Restricted Access". Each person belongs to exactly one tier.
  • Department-based roles: assigned by department — for example, "Engineering" gets chat + Cowork + Claude Code + code execution; "Research" gets chat + web search + memory + projects; "Business" gets only chat + web search + projects.
  • Admin delegation roles: delegate a portion of administrative permissions without granting full Owner access. For example, a "Finance" role has only Billing permissions and no chat access; an "Engineering Lead" role has Claude Code plus Analytics viewing.

Key principle: a feature must be enabled organization-wide first, before a custom role can assign that feature to specific groups. If a feature is disabled at the organization level, no custom role can turn it on.

Implementation process (5 steps):

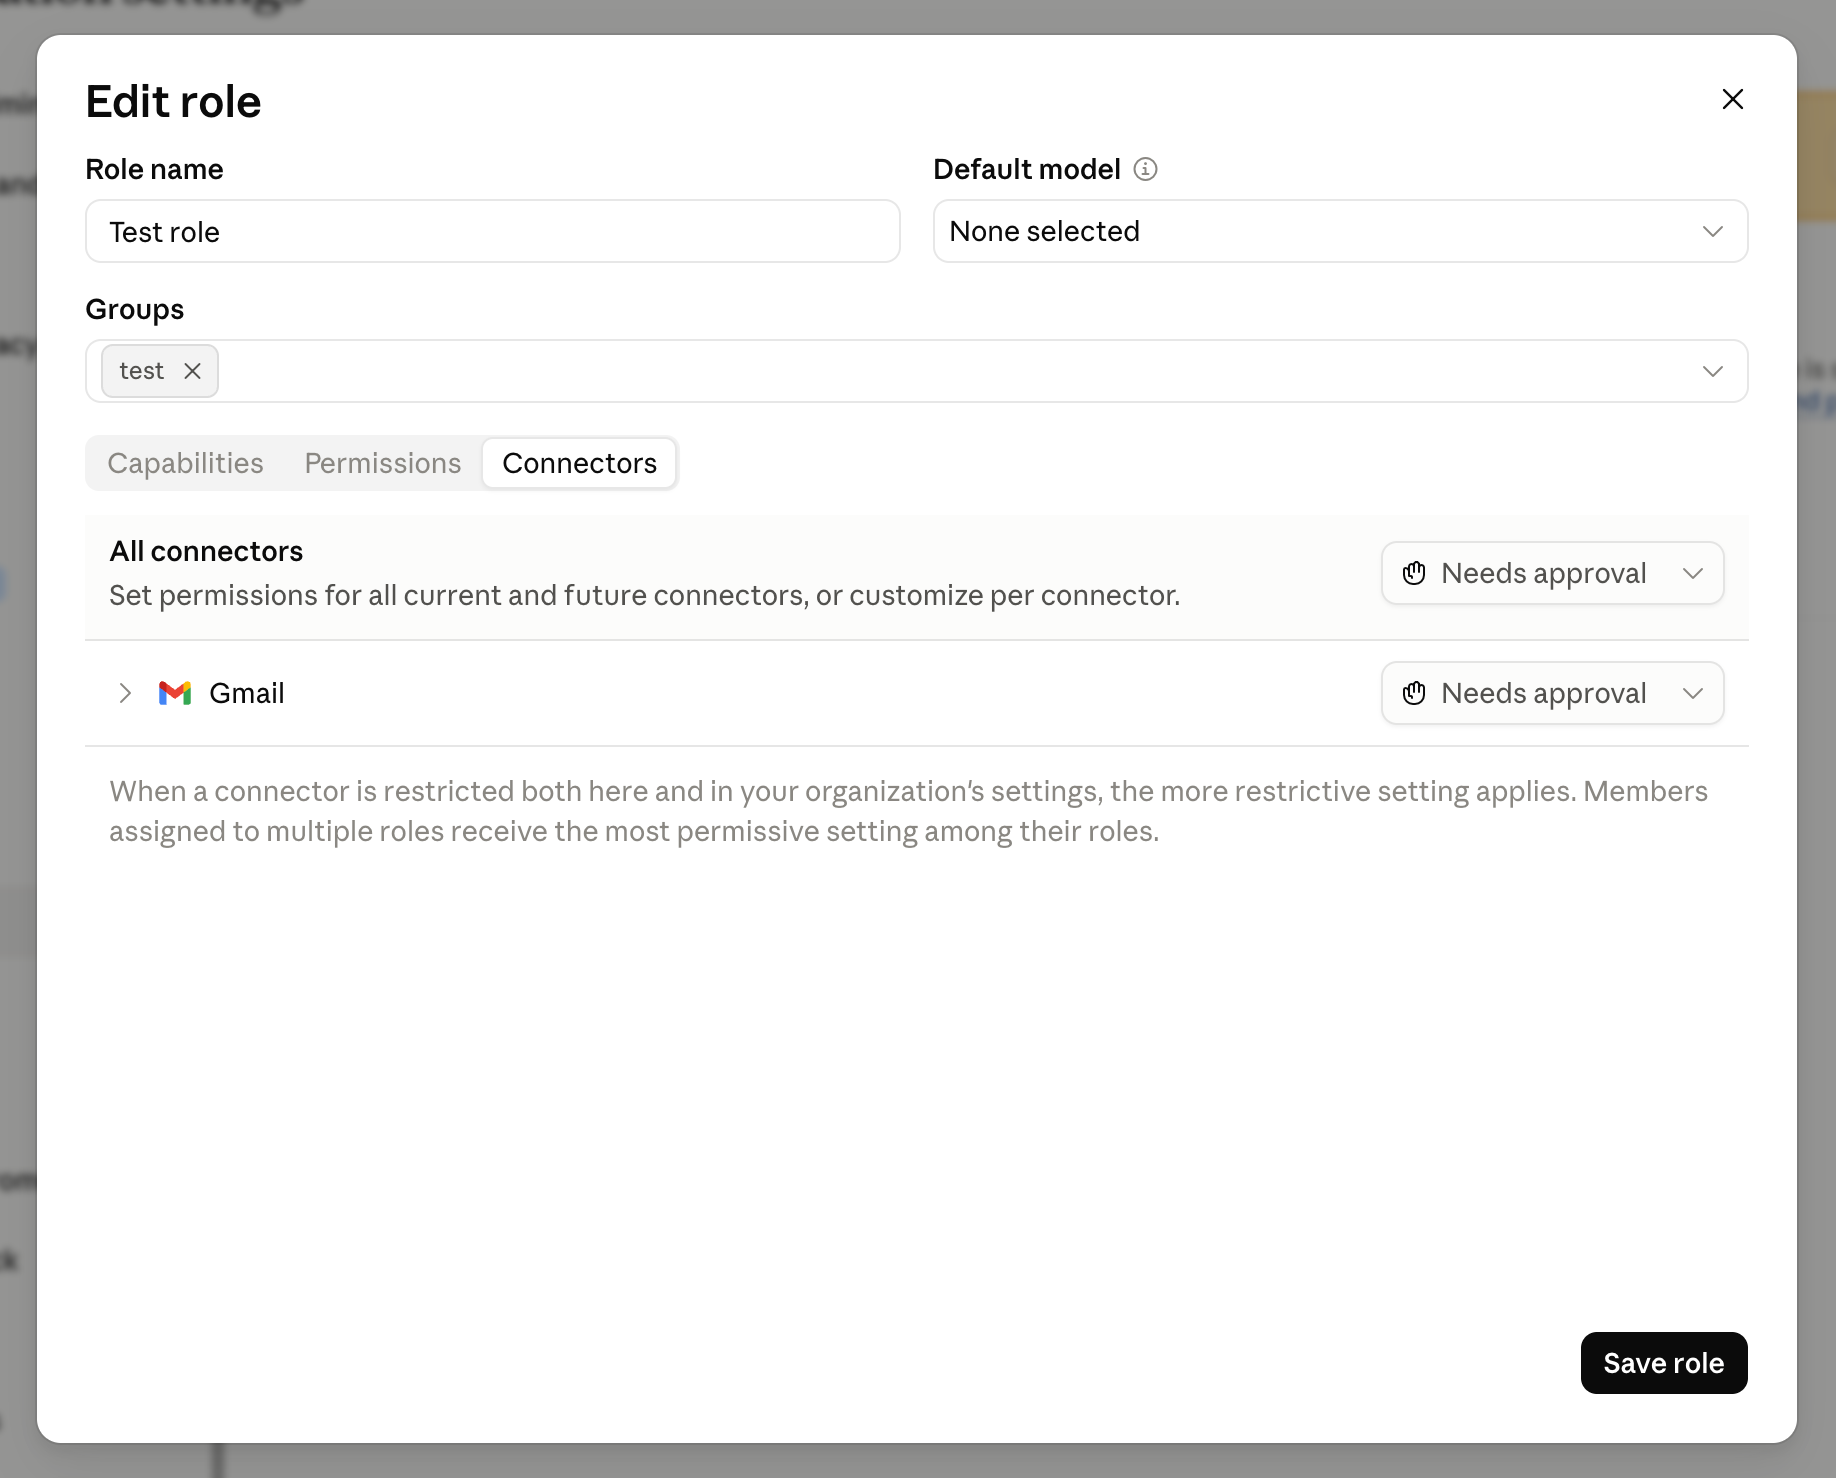
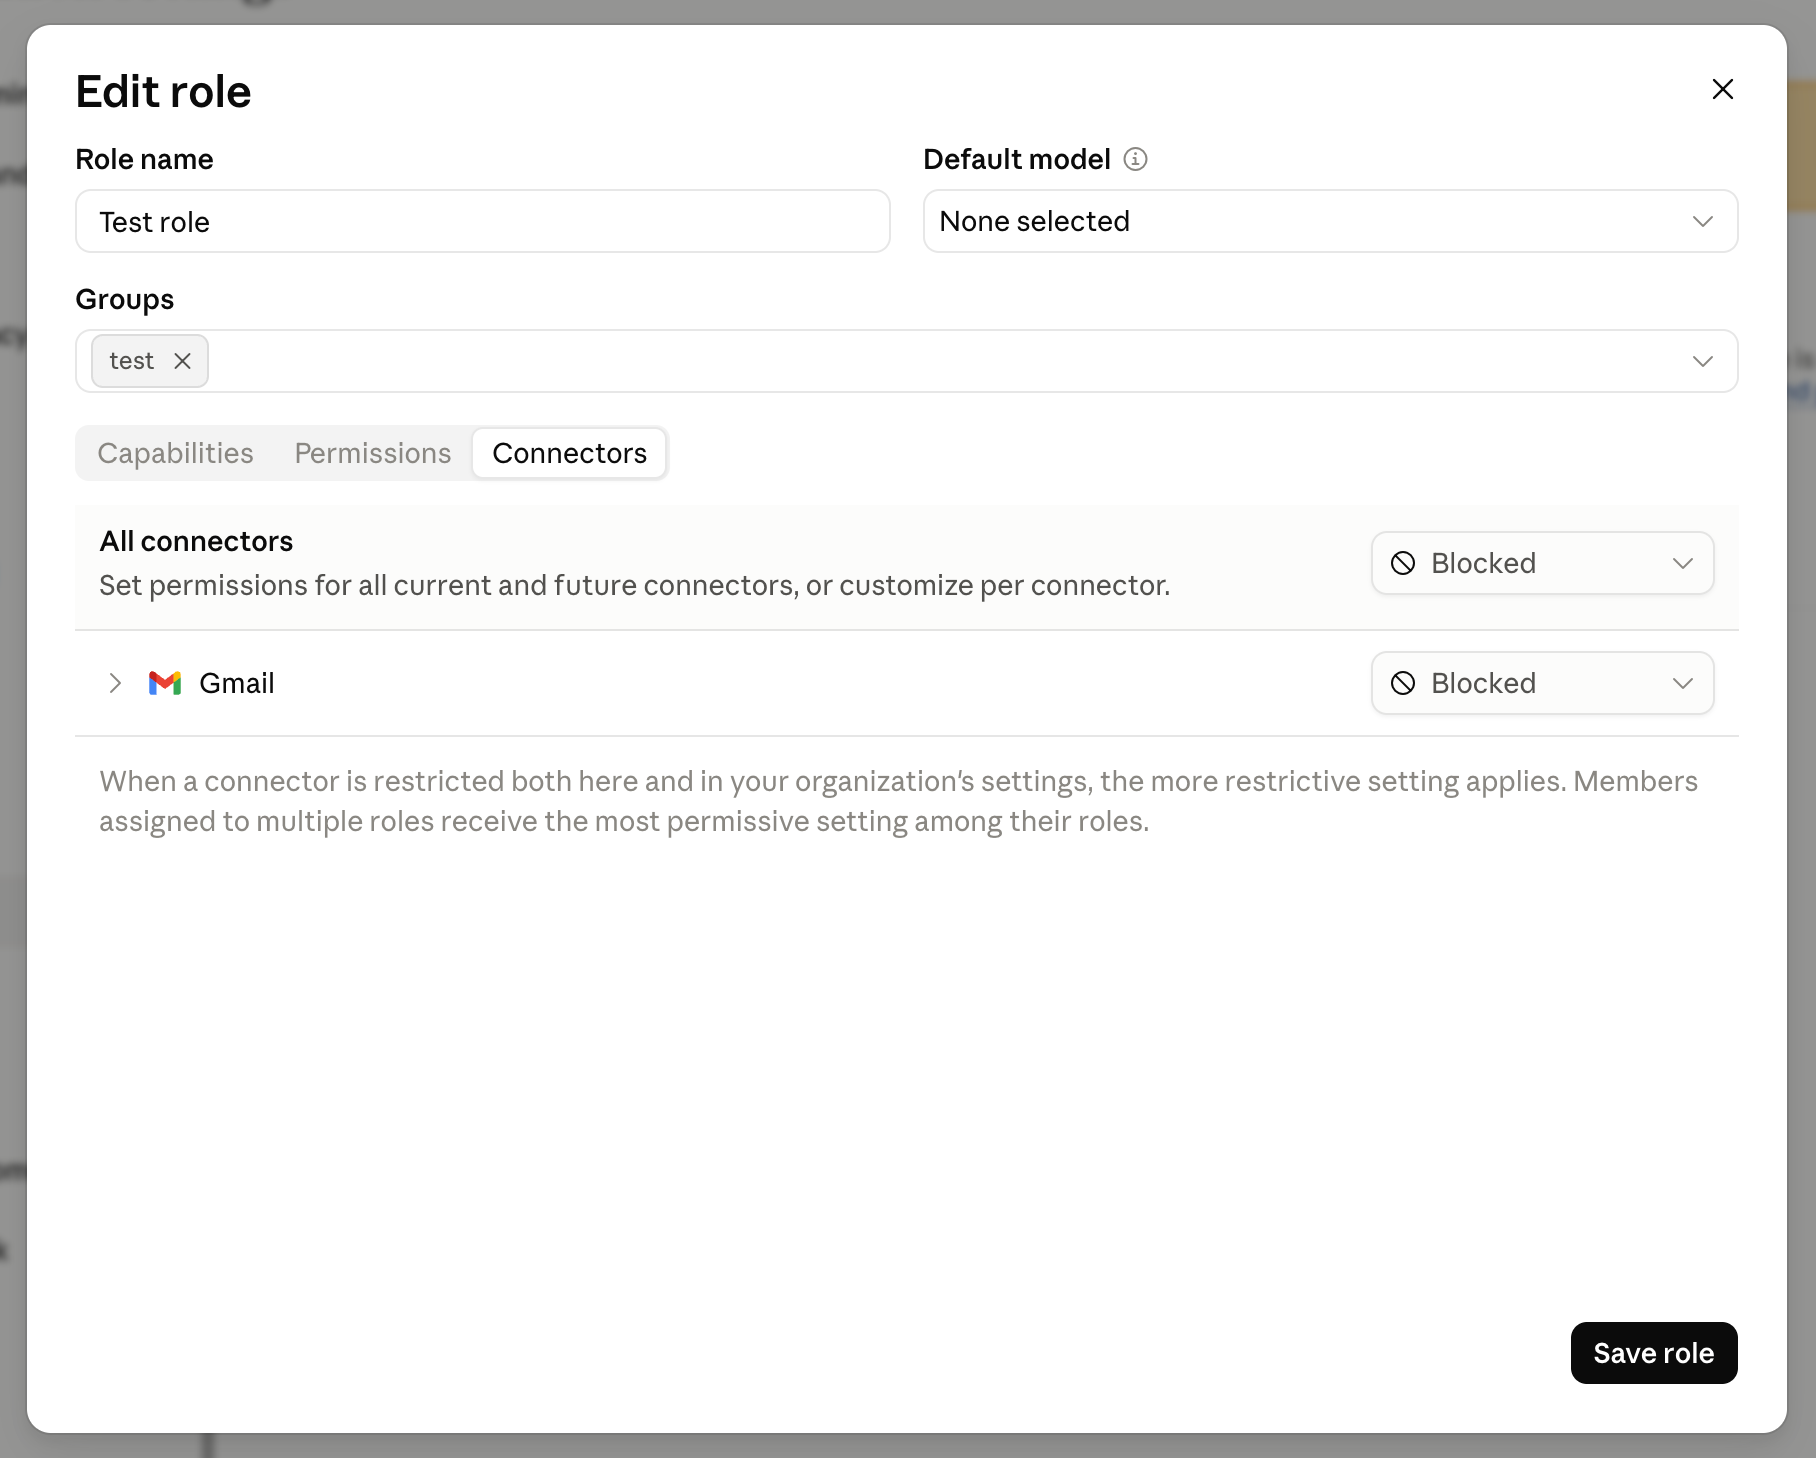
  1. Create custom roles with specific capabilities, admin permissions, and connector permissions.
  2. Create groups — manually or auto-synced from an IdP via SCIM.
  3. Add members to their corresponding groups.
  4. Switch members' roles to "Custom".
  5. Enable the necessary features at the organization-wide level.

Only perform the final step (enabling features at the organization level) after custom roles have been created, admin/connector permissions configured, groups created, and all members confirmed to be assigned to a group — if the feature is enabled first, everyone (including those not yet assigned to a group) may temporarily gain unintended access.

Management is done centrally at Organization settings > Roles, Groups, Members. If the organization has a parent/child structure (parent company — subsidiary), groups synced via SCIM can propagate down to child organizations. Permissions are additive across groups: if any role in a member's chain grants a feature, they will have that feature.

↑ Back to top

Managing Custom Roles (Enterprise)

View source ↗

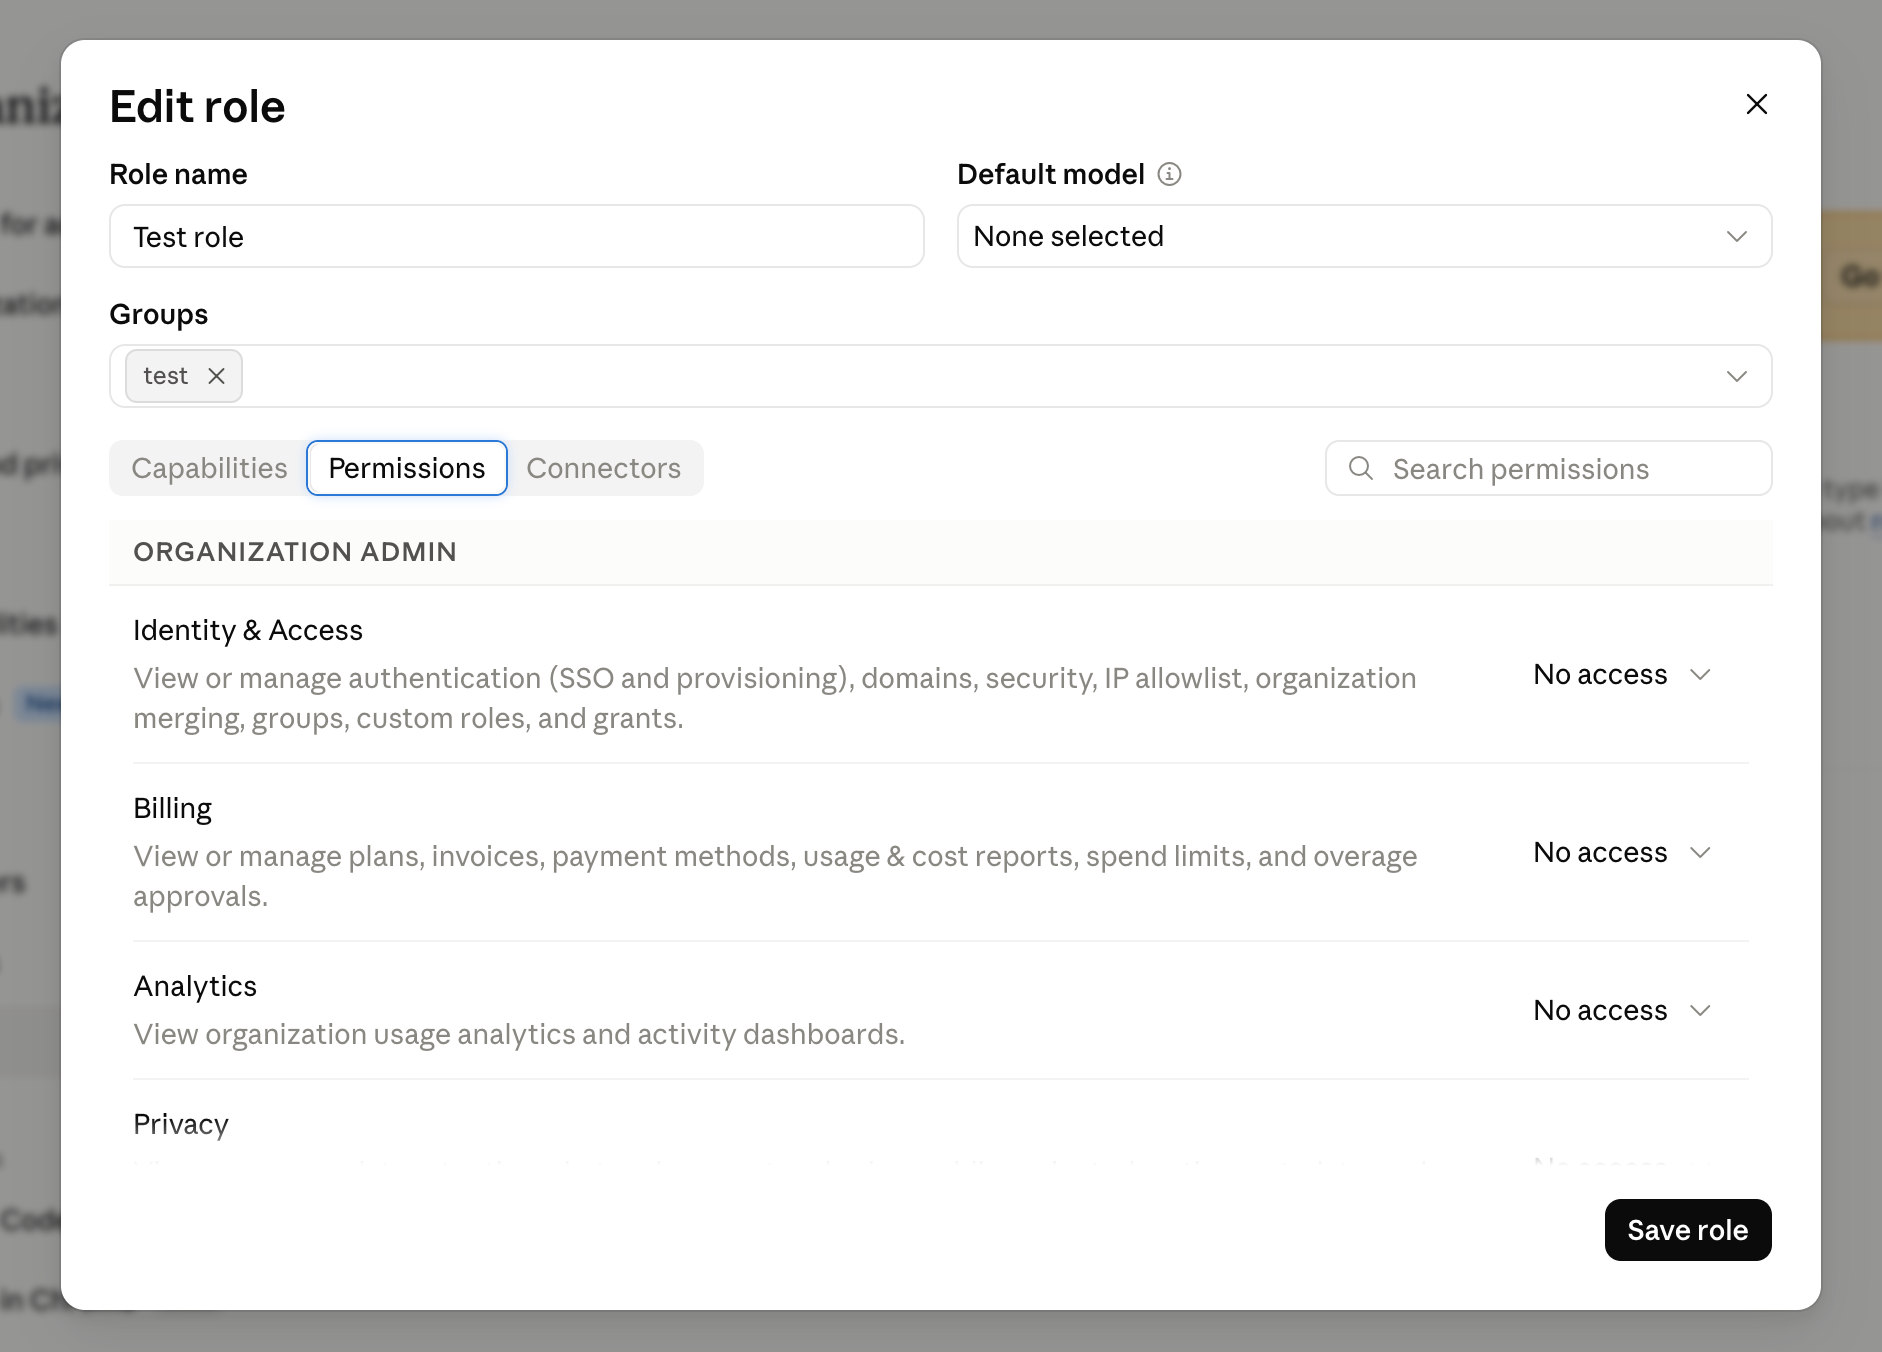
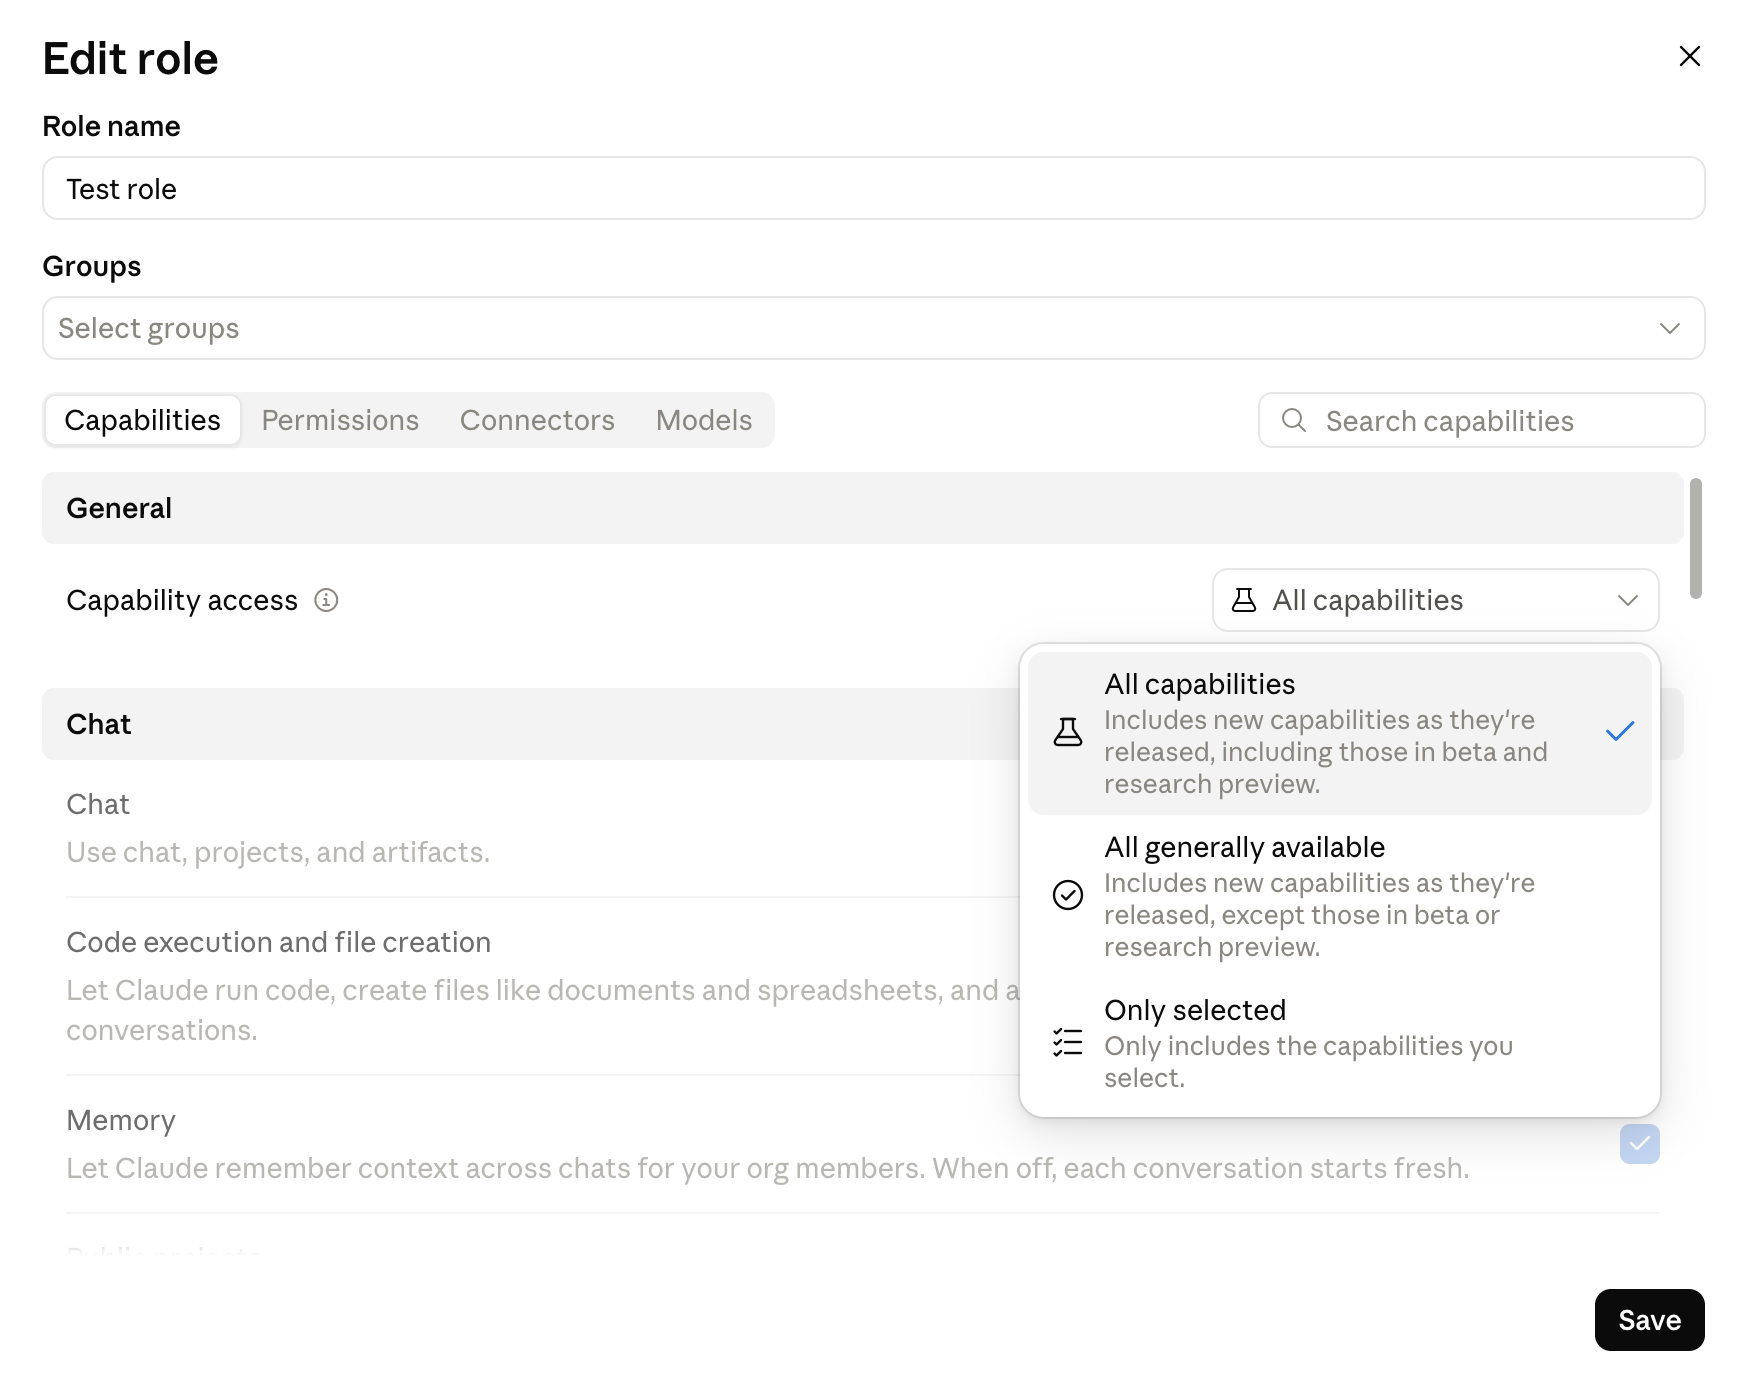
A custom role determines which features a member can access. Only Owners, Primary Owners, or people with a custom role that grants Identity & Access = "Can manage" permission can access Organization settings > Roles to manage them.

What does a custom role control? Each custom role contains a set of permissions that allow or restrict access to specific capabilities such as chat, Claude Cowork, Claude Code, web search, and any connected connectors (Slack, Google Drive, etc.). A custom role can also grant admin permissions (billing, identity, privacy, etc.) without turning that member into an Owner.

Custom roles only affect members whose role is "Custom." Members with the User/Admin/Owner role get their permissions directly from that role, independent of any custom role.

Order of precedence when determining access to a feature (the most restrictive setting always wins):

  1. Platform-level override: some features may be forced on or off by Anthropic under contract terms and cannot be changed in organization settings.
  2. Organization-level setting: an Owner/Primary Owner turns a feature on or off for the entire organization. If it is turned off here, no custom role can enable it.
  3. Custom role permissions: if the feature is enabled at the organization level, the member's custom role determines whether they can use it.
  4. User-level setting: if the role grants access, the feature remains available unless the member themselves disables it in their personal settings.

Note: the precedence chain above applies to capabilities. Admin permissions work differently — they are not blocked by an organization-level switch or a personal setting. If a member's custom role grants a given admin permission, they have that permission immediately.

↑ Back to top

Managing Members

View source ↗

A guide to adding, removing, and managing members on the Team/Enterprise plan.

Permissions: Admins manage members at Organization settings > Members, but only Owners and Primary Owners can access Organization settings > Billing.

Adding a member by invitation:

  1. Go to Organization settings > Members and click "Add member."
  2. Enter the email address (it must belong to a domain the organization has allowed).
  3. Choose the seat type and assign a role/permissions.
  4. On Enterprise, you can select the "Custom" role — this person's permissions will then be determined by their group and custom role (see section 3).
  5. Click "Add members." An invitation email will be sent, which expires after 21 days if not accepted.

Important note: a pending invitation occupies a seat immediately — the invitee does not need to accept the invitation for that seat to count toward the number in use.

You can invite multiple people at once using "Bulk add" (paste a list of emails separated by commas or line breaks), or create a shareable invite link to send directly to colleagues. There is also "organization discovery": colleagues with an email on the same domain can find and request to join the organization themselves when signing up, and admins can choose to auto-approve these requests or require manual approval.

↑ Back to top

Setting Up Single Sign-On (SSO)

View source ↗

Single sign-on (SSO) is available for the Team plan, Enterprise plan, and organizations on the Claude Console.

Step 1 — Prerequisites:

  • For Team/Enterprise: the person performing this must have the Owner or Primary Owner role.
  • Access to the DNS settings of the company's email domain is required.
  • Access to the company's Identity Provider (IdP) is required — for example Okta, Microsoft Entra ID, or Google Workspace.

Anthropic uses WorkOS as the infrastructure provider for domain verification and SSO/SCIM — during setup, the system will guide you through WorkOS's configuration flow.

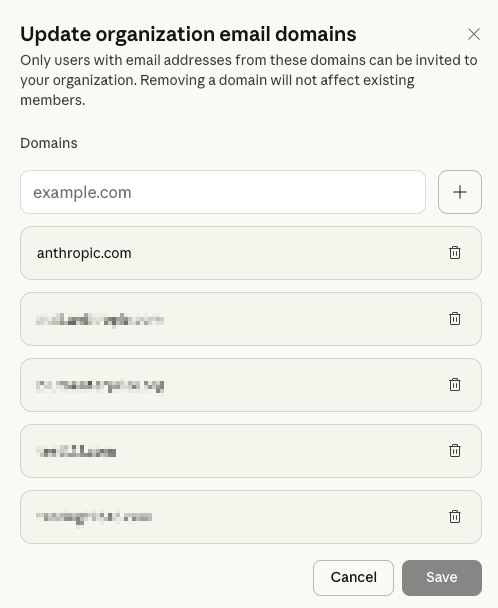
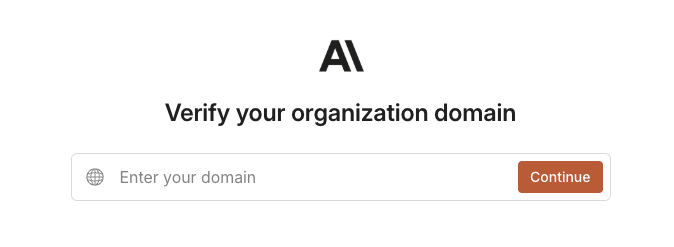
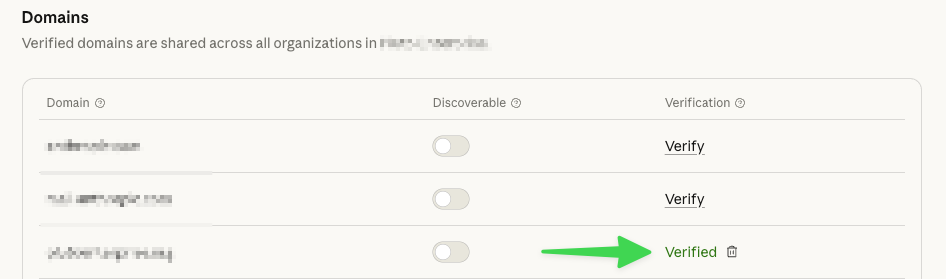
Step 2 — Verify the domain: prove ownership of the company domain. You can verify multiple domains for the same organization, but they must all be managed through a single IdP (mixing domains from different IdPs within the same organization is not supported). Verifying the domain alone does not affect current users' access — it only has an effect once SSO is set up and enforced.

Do this in Organization and access settings on claude.ai (or Identity and access settings on the Console), go to the Domains section, select "Add or edit domains," and enter the domain to verify.

The next steps (connecting the IdP, configuring SAML/OIDC, enabling enforcement) are carried out according to WorkOS's instructions specific to your IdP provider (Entra ID, Google Workspace, Okta, etc.).

↑ Back to top

Setting up SSO with Microsoft Entra ID

View source ↗

Claude Enterprise uses WorkOS as the intermediary layer that handles SSO/SCIM for every identity provider (IdP). For Bluemarq — which currently uses Microsoft 365 — the corresponding IdP is Microsoft Entra ID (the new name for Azure AD). This section walks through connecting Entra ID to Claude via the SAML protocol, since this is the method Anthropic recommends and supports most fully for Entra ID.

Prerequisites

  • A Claude account with the Owner or Primary Owner role (for Team/Enterprise plans).
  • DNS edit permissions for the company's email domain (to verify the domain).
  • Administrator permissions in the Microsoft Entra admin center (Global Administrator or Application Administrator) to create the Enterprise Application.
  • A Microsoft Entra ID P1 or P2 license — required only if you also want automatic SCIM provisioning (not required for SSO alone).

Step 1 — Verify the domain

At claude.ai/admin-settings/organization, go to the Domains section, add Bluemarq's email domain, and click Verify. The system will issue a TXT record in the form anthropic-domain-verification-...; add this record to DNS at the domain root (@). Wait about 10 minutes, then click refresh to confirm — note that DNS propagation can take up to 24–48 hours globally.

Step 2 — Connect Entra ID via WorkOS

Once the domain is verified, go to the Identity and access section in admin settings and choose to set up SSO. Anthropic will redirect the administrator to the WorkOS configuration flow, which displays the values to enter into Entra ID: Entity ID and Reply URL (ACS URL) — these values are shown only within the WorkOS setup flow and cannot be obtained through support.

StepAction in the Entra Admin Center
1Go to Enterprise Applications → New application, choose "Create your own application," give it a name (e.g. "Claude"), and select the "Non-gallery" integration type.
2Go to Single sign-on → SAML and edit the "Basic SAML Configuration" section.
3Enter Identifier (Entity ID) = the Entity ID value from WorkOS.
4Enter Reply URL (Assertion Consumer Service URL) = the ACS URL value from WorkOS.
5Set the Sign-on URL to https://claude.ai/login.
6In Attributes & Claims, make sure the email claim points to user.mail, along with the name claims: givenname → user.givenname, surname → user.surname, name → user.userprincipalname.
7Download the Federation Metadata XML file (or grab the App Federation Metadata URL) and upload/paste it back into the WorkOS setup flow to complete the metadata exchange.
8Go to Users and groups and assign the Bluemarq users/groups allowed to use Claude — only people assigned here will be able to sign in via SSO.

Step 3 — Test and enforce mandatory SSO

Back in Claude's admin settings, click Test Single Sign-on to confirm the login flow works without errors (it's recommended to use a test account before rolling this out company-wide). Once the test succeeds, turn on Require SSO for Claude to require all 25 of Bluemarq's seats to sign in via Entra ID, disabling regular email/password login.

Combining with SCIM

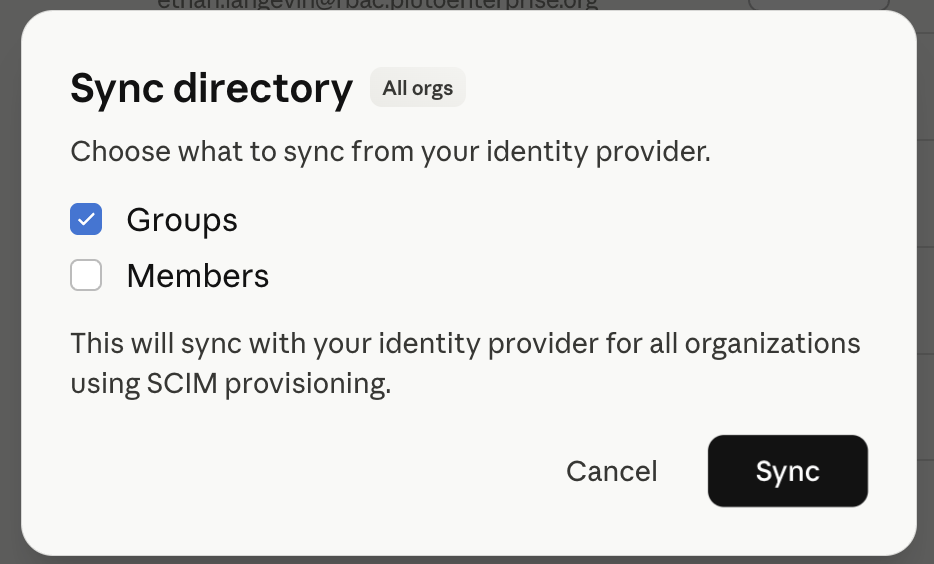
Once SSO is running smoothly, Bluemarq should also configure SCIM provisioning (Provisioning → Get Started in Entra, using the Tenant URL and Secret Token issued by WorkOS) to automatically create/remove users and sync groups as staffing changes occur in Entra ID, instead of manually inviting each person. Note that the email attribute used for SCIM must match the email claim used for SSO — this is the most common cause of login errors. Entra ID only pushes SCIM changes every 40 minutes, so there is some inherent delay when adding/removing users.

Recommendation for Bluemarq (25 seats, Entra ID):

  • At a scale of 25 seats, mandatory SSO should be enabled right after a successful test to prevent employees from creating personal accounts with their company email before the domain is locked to SSO.
  • Enable SCIM (not just JIT) from the start, since Bluemarq already has P1/P2 — this lets IT automatically revoke Claude access as soon as an employee's account is disabled in Entra ID, which matters for sensitive company data.
  • Carefully verify the email/name claim mapping before assigning the whole group — test with 2–3 IT accounts first before rolling out to all 25 users.

Source: Microsoft Entra ID SSO setup — Claude Help Center

Source: Set up single sign-on (SSO) — Claude Help Center

Source: Set up JIT or SCIM provisioning — Claude Help Center

Source: Entra ID SAML (formerly Azure AD) — WorkOS Docs

↑ Back to top

Automatic account provisioning: JIT / SCIM

View source ↗

There are two mechanisms for automatically adding users to Claude when they sign in through the company's identity management system (IdP):

JIT (Just-in-Time)SCIM
Adding an accountAutomatic on the first SSO loginAutomatic, instant — no prior login required
Removing an accountManualAutomatic when removed from the IdP
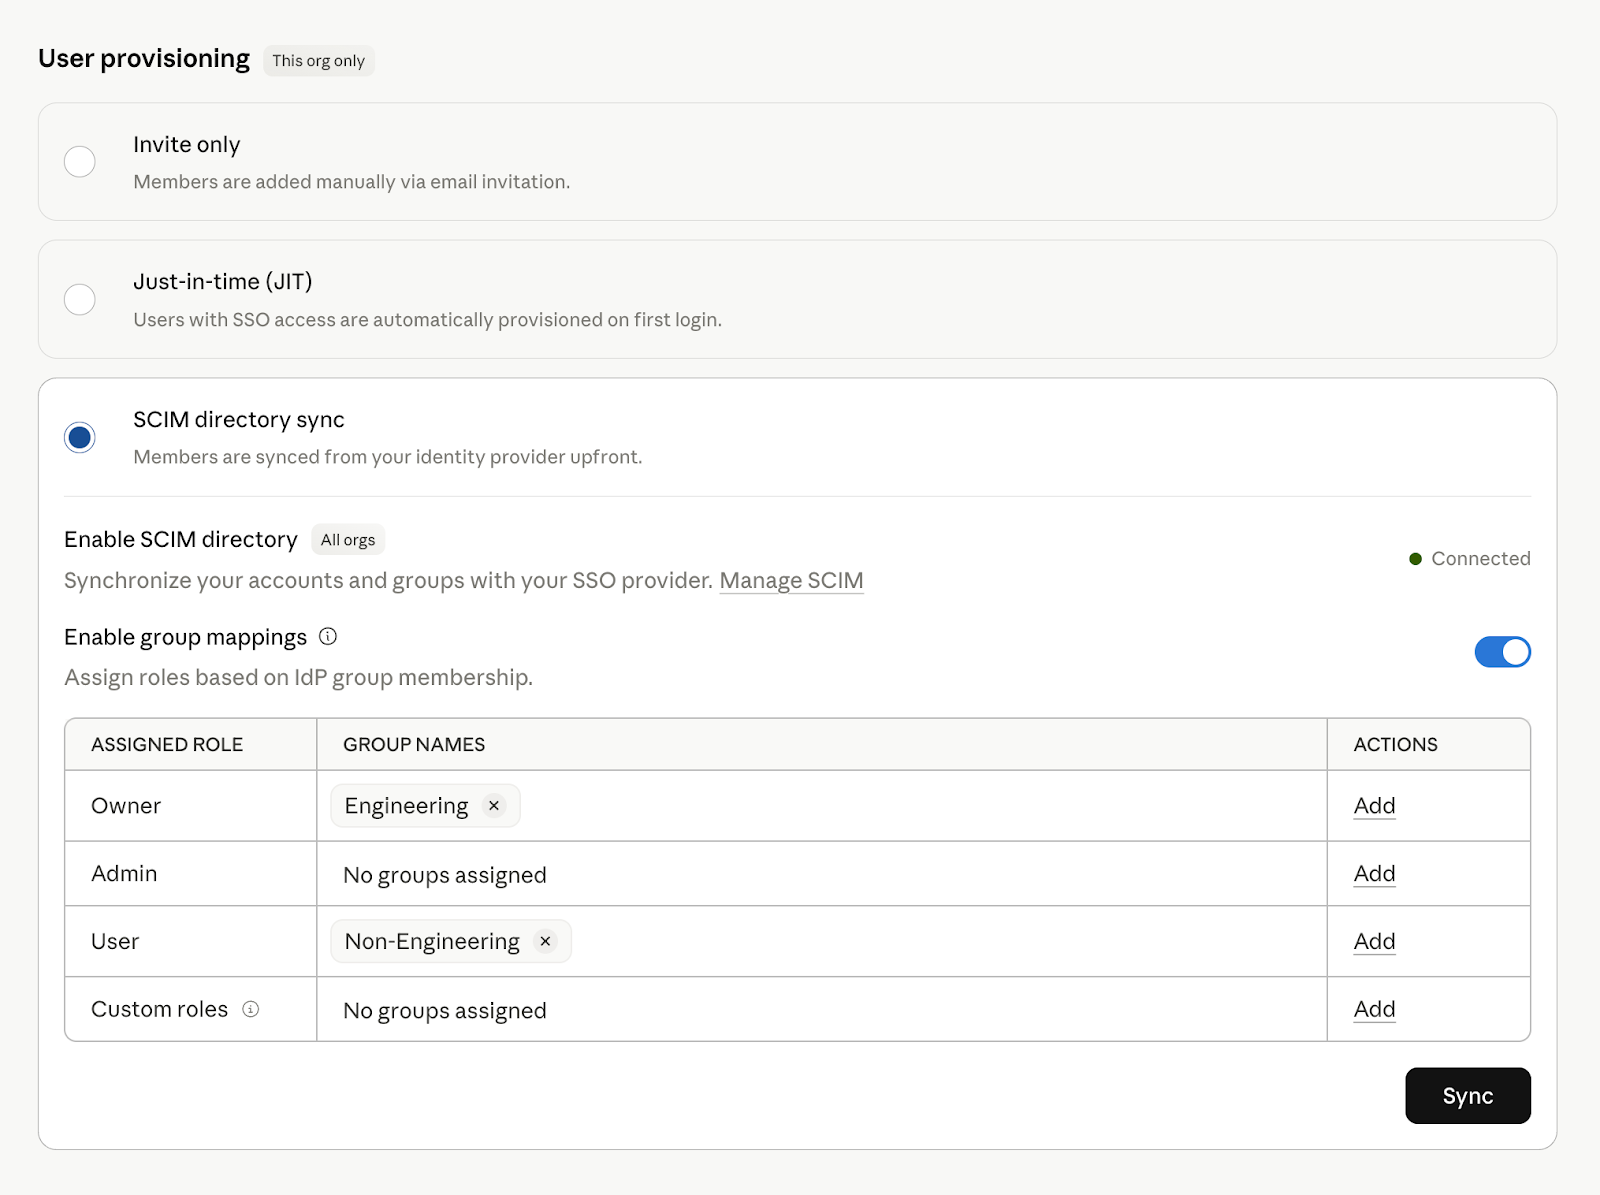
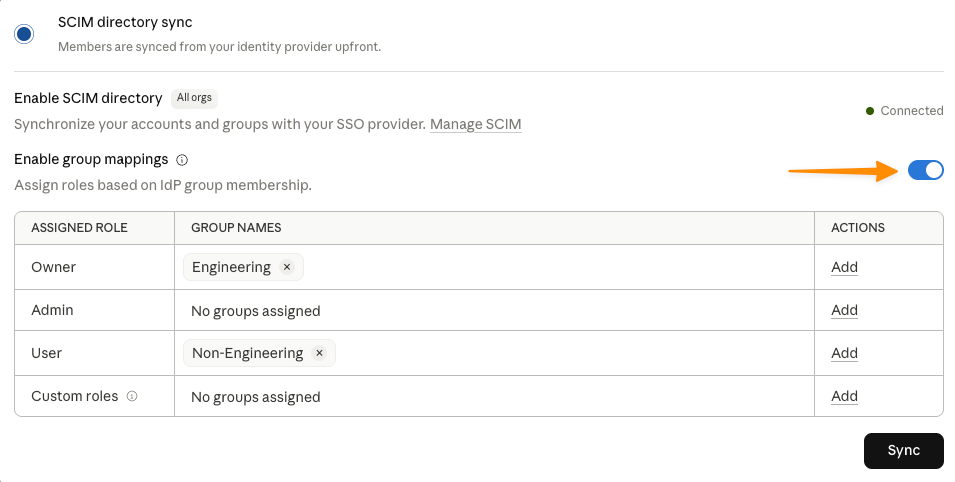
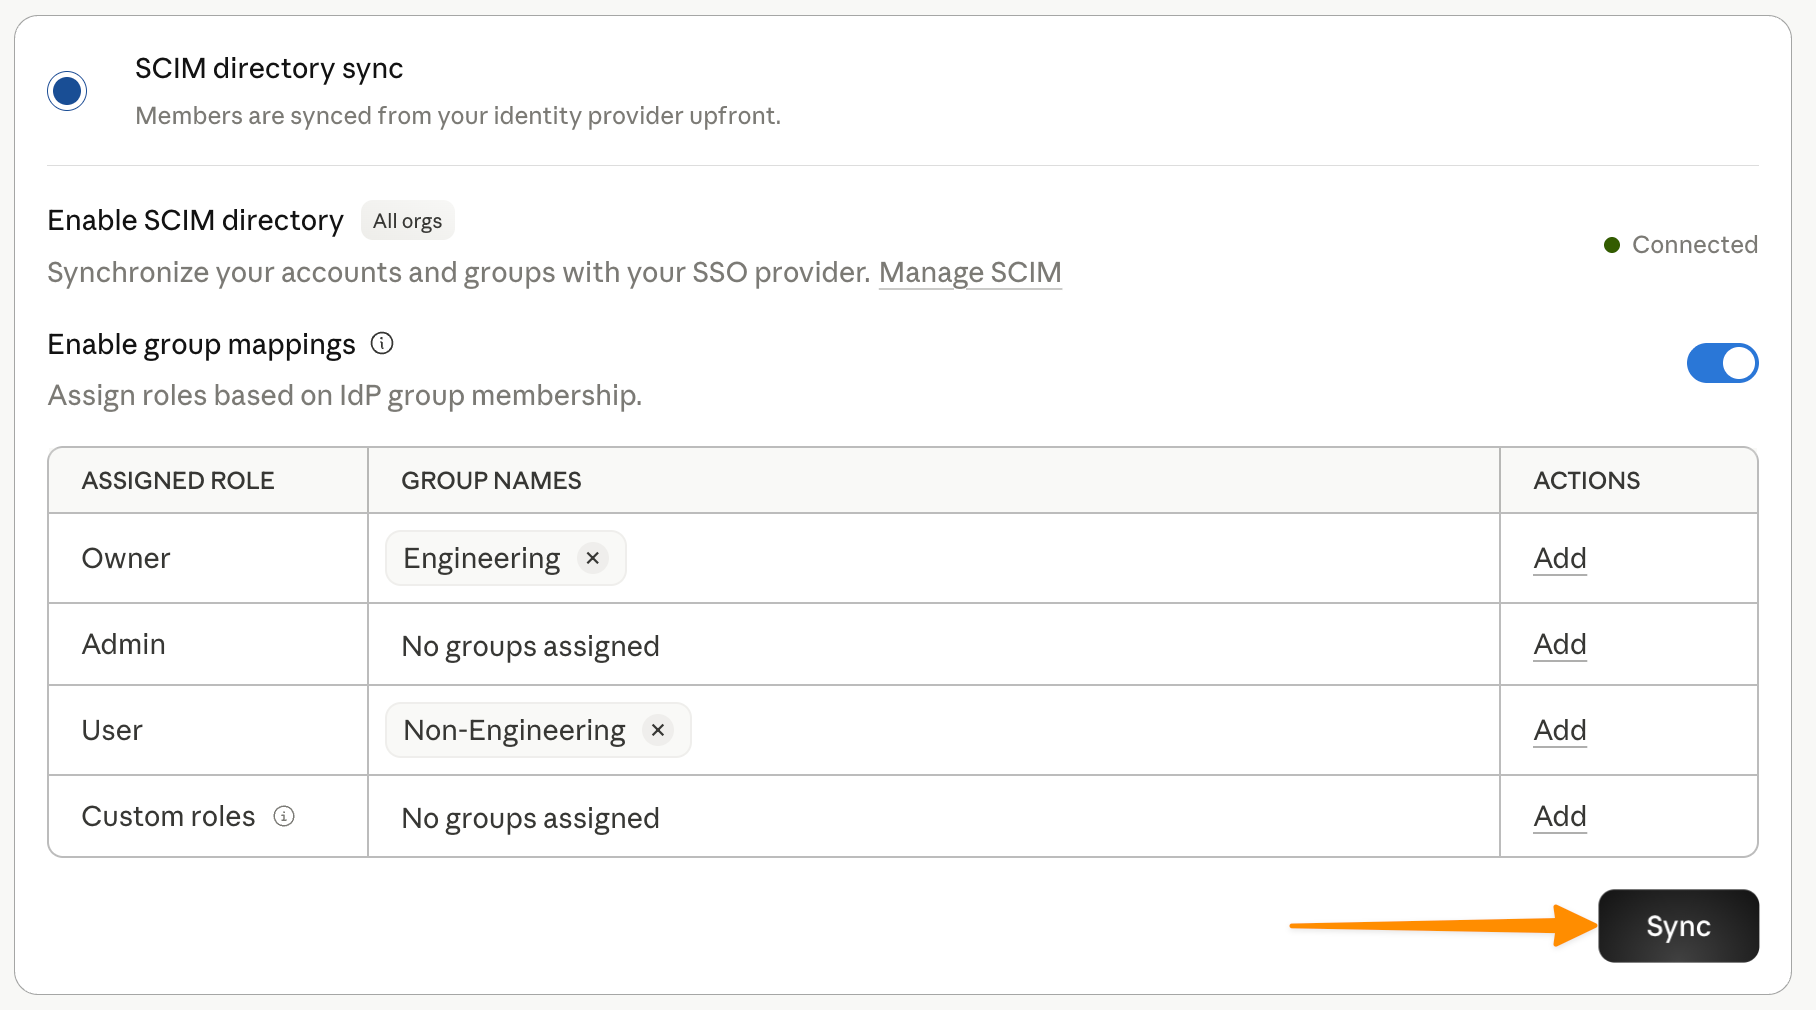
Updating a roleManual (or automatic via group mapping on the next login)Automatic via group mapping
Applies to plansAll plansEnterprise and Console only

Setup order:

  1. Complete SSO configuration first, and verify the company domain.
  2. For SCIM: connect the IdP via WorkOS (Anthropic's SSO/SCIM infrastructure provider).
  3. Make sure users have been assigned to the Anthropic application in the IdP before saving the provisioning configuration.
  4. (Optional) Create groups in the IdP matching the desired roles/seat tiers, then map them in Claude's settings.

On seat counts: both methods consume a seat when a user joins — make sure there are enough free seats available before enabling provisioning, to avoid accounts being removed unintentionally.

Recommendation for BLUEMARQ's 25-seat contract: use SCIM (not JIT) — this keeps accounts automatically added/removed in sync with the HR system, preventing former employees from retaining accounts (a security risk), while also automatically enforcing the 25-seat limit.

↑ Back to top

Billing & invoices (Billing)

View source ↗

All of the organization's billing information lives under Organization settings > Billing on claude.ai. This is the most strictly access-controlled area of the admin panel: only the Owner and Primary Owner roles can view and act on it — even Admin has no permission to view or edit invoices/payment methods (see the permissions model in detail in the Roles & Permissions section).

RoleView Billing pageView/download invoicesUpdate payment
Primary Owner✅✅✅
Owner✅✅✅
AdminNoNoNo
MemberNoNoNo

Anthropic operates two billing models for Enterprise: self-serve (prepaid credit purchased by credit card/ACH directly in the app) and sales-assisted (a contract signed through the sales/partner team, with monthly invoices based on actual usage, paid by bank transfer — bank transfer is mandatory for invoices of USD 50,000 or more). Bluemarq's plan (25-seat Enterprise) was purchased through VietCAD acting as partner/reseller, so it falls under the contract model: there is no credit card entered directly in the app, and invoicing, renewal, and seat-count adjustments are handled according to the contract terms between Bluemarq, VietCAD, and Anthropic.

Seat fees vs. usage: the Enterprise seat fee is billed on an annual contract basis, granting each seat-holding user access to Claude on web/desktop/mobile, Claude Code, and Cowork; this does not include token costs. If the contract includes a usage component (API/Claude Code usage above the included allotment), that portion is billed separately at standard API rates and charged in aggregate to the organization as a whole, not broken down per individual. When seats are added mid-contract, the resulting charge is typically prorated for the remaining contract period.

Relationship to usage reporting (Usage/Spend Analytics): permission to view Analytics (spend, token counts, per-member activity) is a separate admin permission from Billing access — an Admin may be granted Analytics visibility to track operating costs, but still cannot see the underlying invoices or payment method unless granted the Owner role or a separate "Billing" admin permission (applicable to custom roles on Enterprise).

Note for Bluemarq: because the 25-seat contract was signed through VietCAD (partner/reseller), official invoicing and annual renewal will be handled by VietCAD in coordination with Anthropic under the contract — not through the self-service card-payment flow in Organization settings > Billing. Bluemarq should designate a single person holding the Owner (or Primary Owner) role internally — typically a Finance/IT representative — as the point of contact for viewing invoices internally on claude.ai and working directly with VietCAD when seat adjustments, payment confirmation, or contract renewal are needed.

Source: How am I billed for my Enterprise plan?

Source: Roles and permissions

↑ Back to top

Quota & Usage Limits

View source ↗

Usage limits are a "conversation budget" that controls how often a user can interact with Claude within a given period. Consumption depends on the length/complexity of the conversation, the feature being used (regular chat, Claude Code, Cowork...), the selected model, and the "effort" level. On paid plans, there is a real-time rolling 5-hour session limit, plus a separate weekly limit for Opus and another for other models — both visible under each account's Settings > Usage.

When a member hits their limit, they must wait until the next reset cycle, or the organization can enable usage credits so work isn't interrupted. On seat-based Team and Enterprise plans, the Primary Owner/Owner enables this feature at Organization Settings > Usage; once enabled, members automatically draw on credits (billed at standard API rates) after exceeding their seat allowance. Admins can set spend limits at three levels: organization-wide, by seat group (Standard/Premium), and per individual — exceeding any of these pauses credit usage until the next billing cycle.

On usage-based Enterprise plans, there is no fixed "quota" allocated per seat — every token from every member is measured and billed directly to the organization at API rates, separate from seat fees. This means one heavy user doesn't reduce another's share, but total cost scales with actual usage. This differs from Pro (priority access during peak hours, fixed per-session limits) and Team (each member has their own limit; a Premium seat gets roughly 6.25x the per-session usage of Pro).

Claude Code and Cowork consume significantly more tokens than regular chat, since each session includes a system prompt, file context, multiple tool calls, and multi-step reasoning; a Cowork task or a long Claude Code debugging session can consume many times more than an ordinary chat.

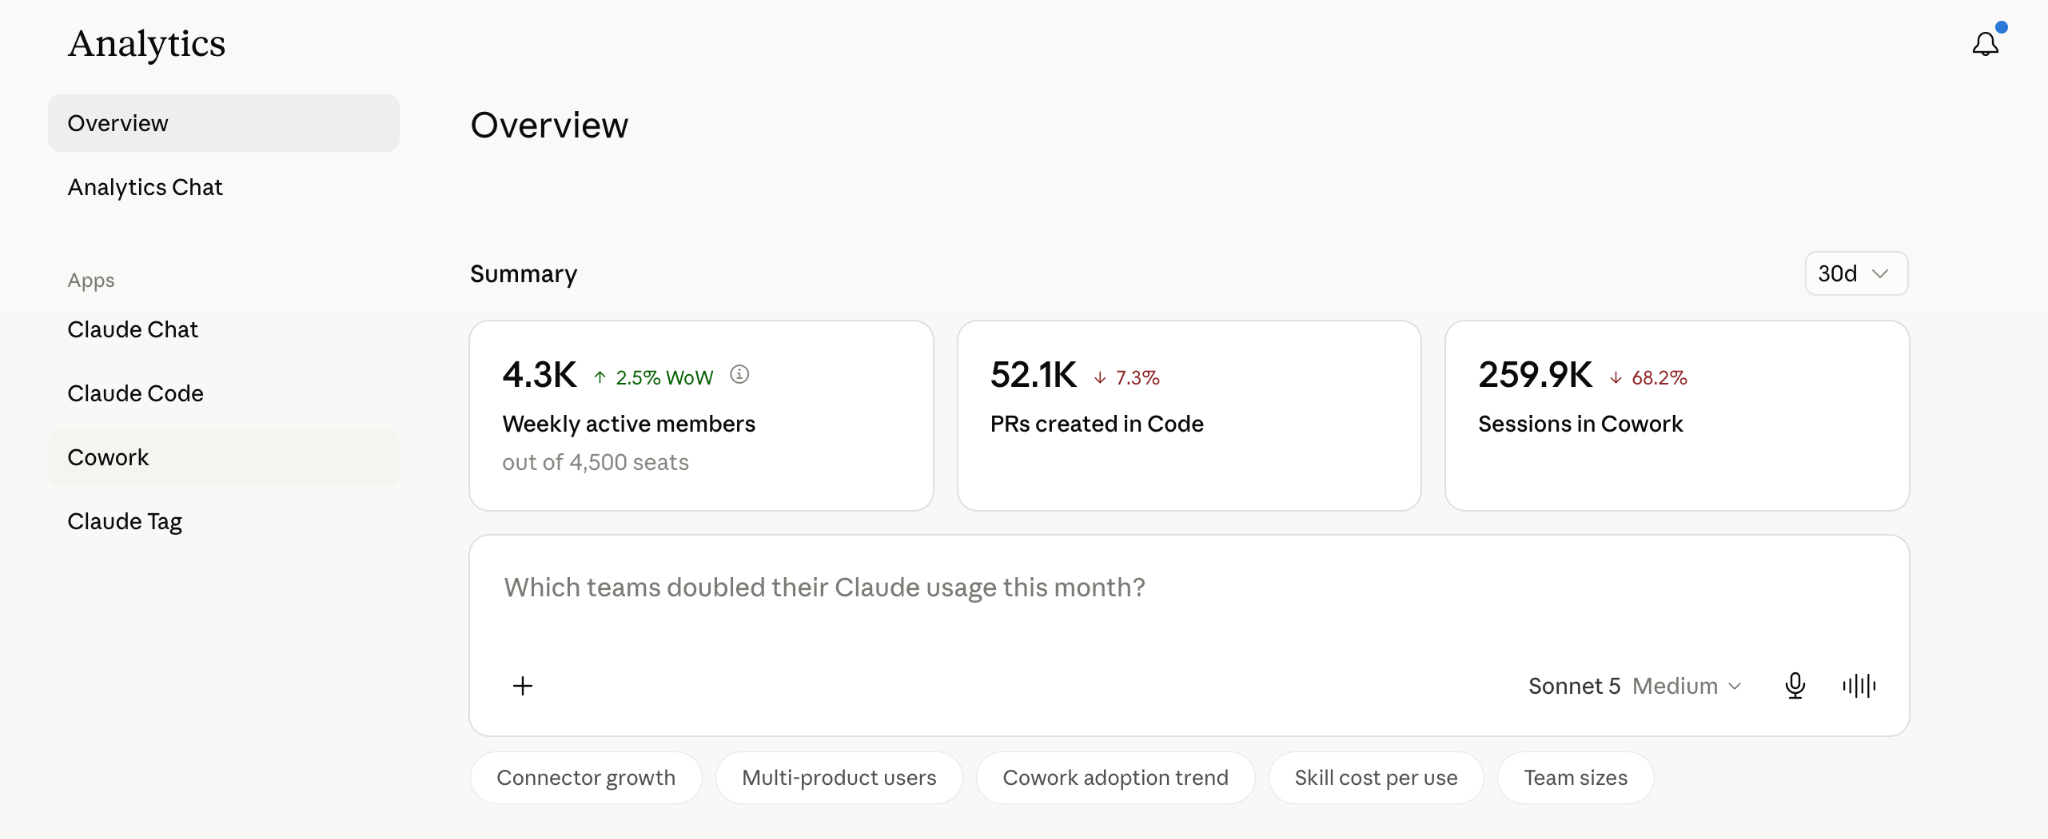
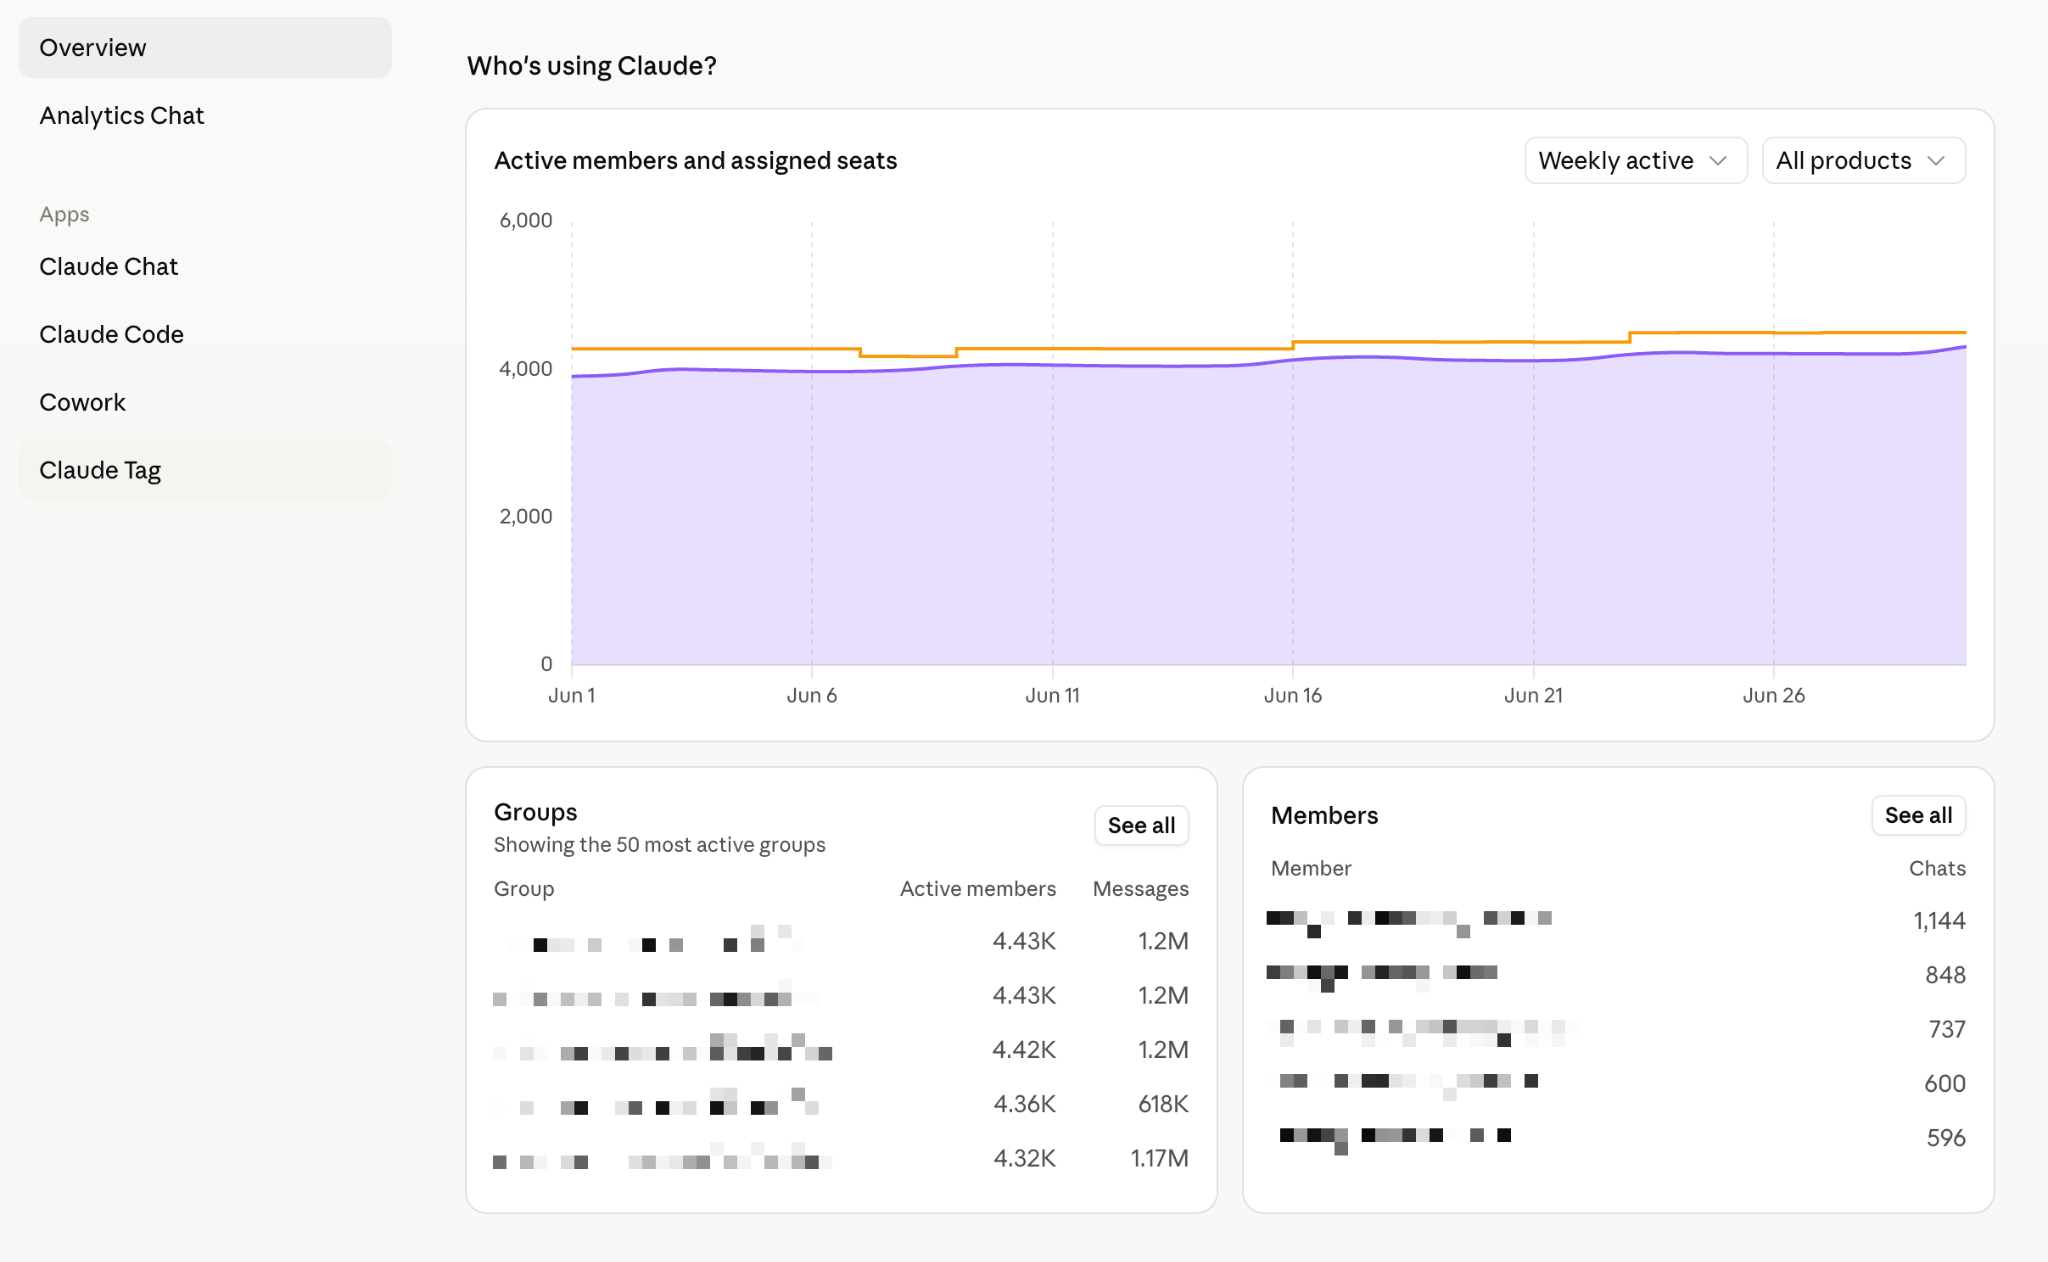
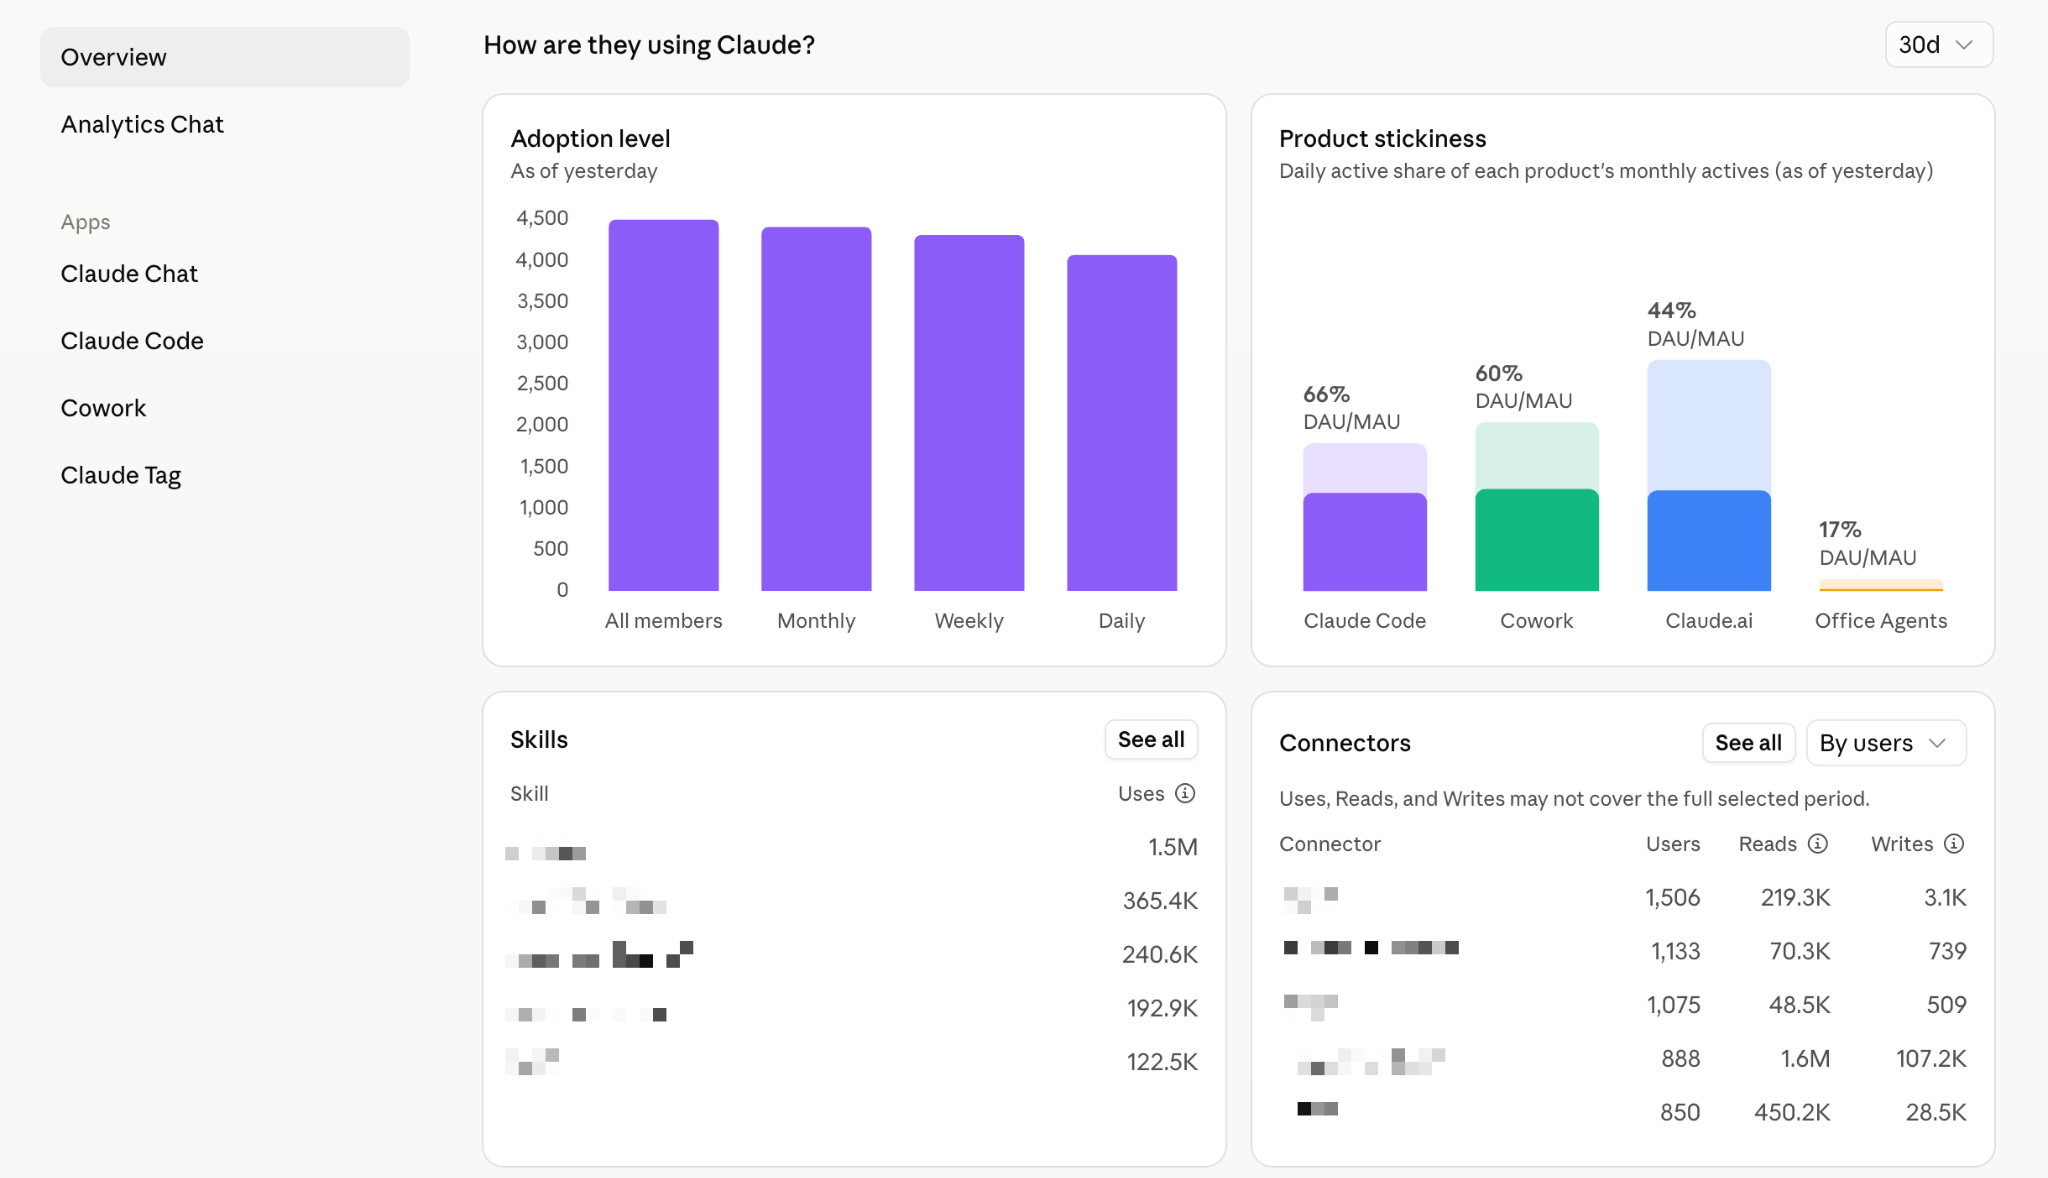
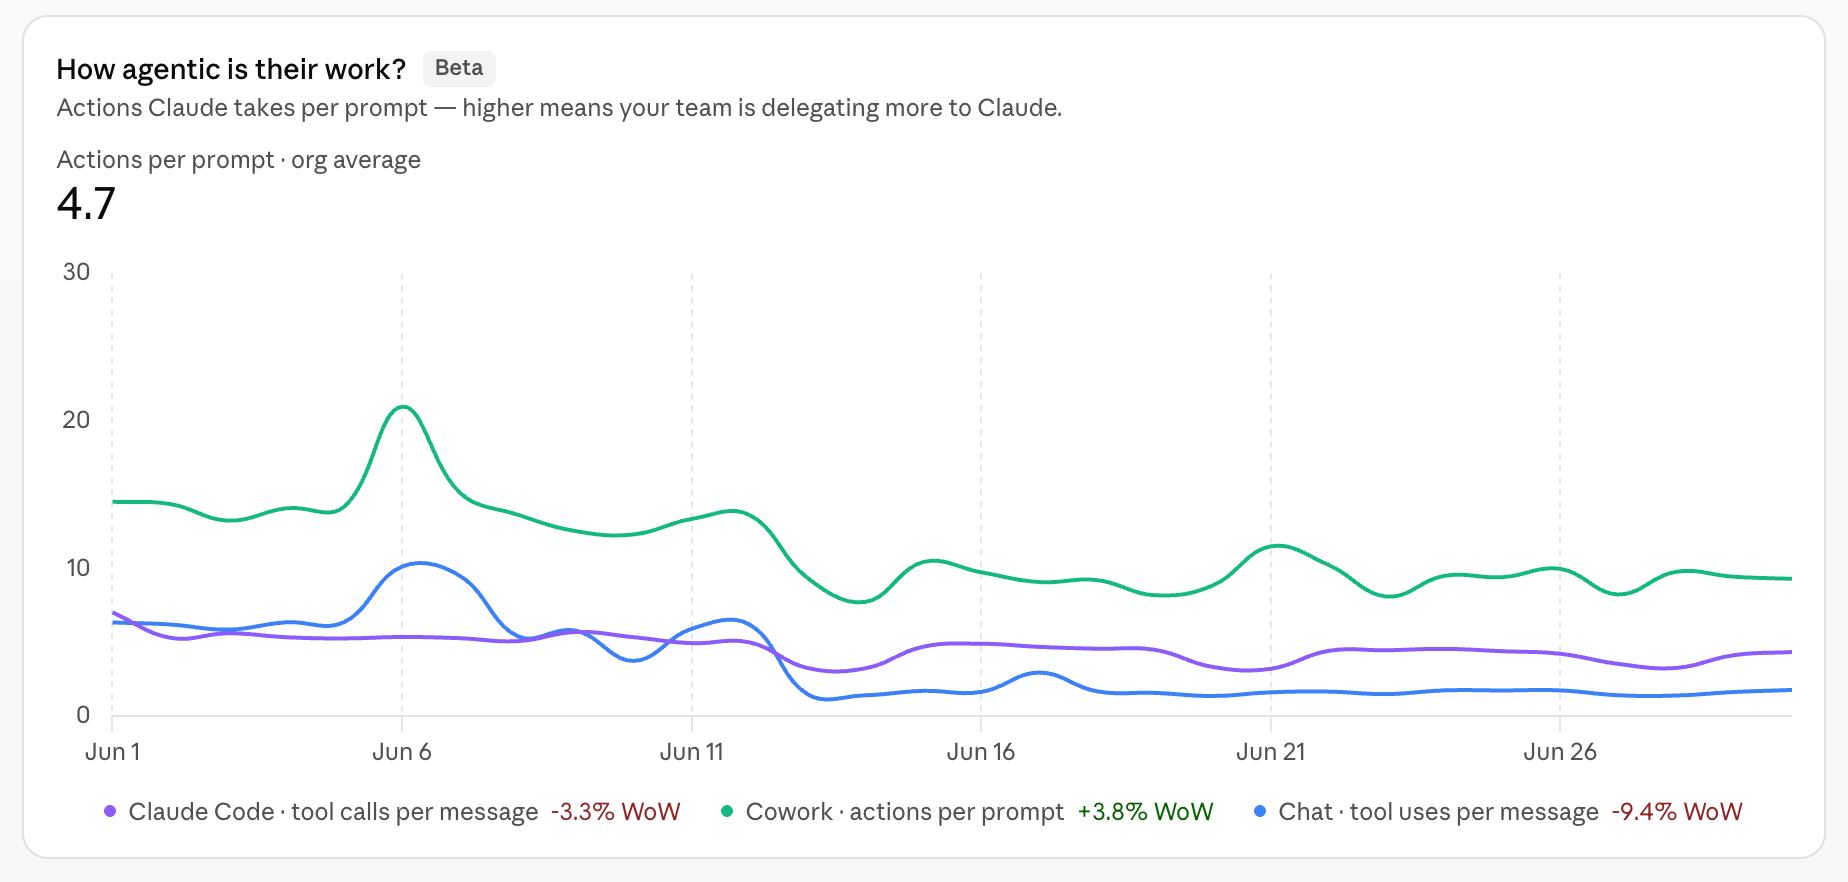
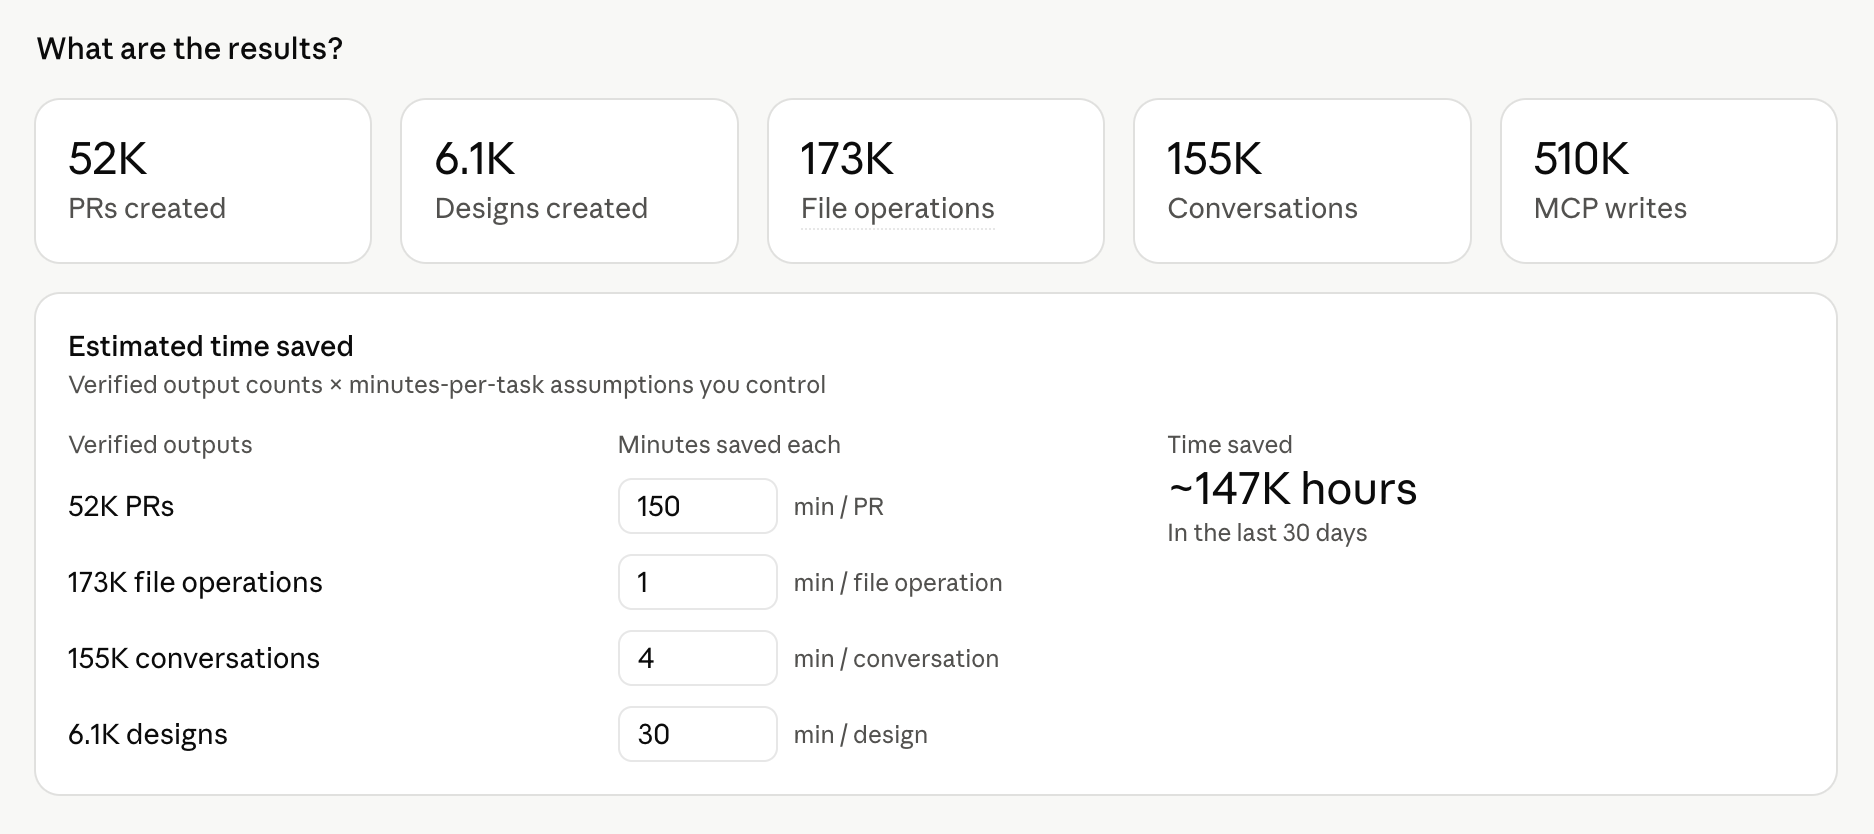
Regarding monitoring: the Owner/Primary Owner (Team) or Owner/Primary Owner/Admin (Enterprise) can go to Analytics (bottom-left menu) to see activity by project, number of conversations/messages, weekly active members, and — for Owner/Primary Owner only — spend data by model and over time, with detailed CSV export by user/model/token. On Enterprise, Admins can view all of Analytics except Spend — only the Owner/Primary Owner can see costs. Enterprise also offers an Analytics API to pull data into a separate reporting system.

Important distinction: the above concerns seat limits on claude.ai/Claude Code/Cowork. If Bluemarq also uses the API/Claude Console (via Workspaces), that's a different limit system — rate limits (RPM/ITPM/OTPM by usage tier: Start/Build/Scale/Custom) and spend limits (a monthly spending cap by tier, which can be set lower for individual Workspaces). See the Workspaces section in the API documentation for more.

Recommendation for Bluemarq (25 seats): each week, have the Owner/Primary Owner check Analytics for spend by model and the top 10% of heavy users (especially anyone running a lot of Claude Code/Cowork); set spend limits by seat group and by individual to prevent a handful of accounts from consuming the shared budget; encourage using Sonnet as the default model for everyday work, switching to Opus only when truly needed, to control costs before considering enabling usage credits.

Source: How do usage and length limits work?

Source: View usage analytics for Team and Enterprise plans

Source: Manage usage credits for Team and seat-based Enterprise plans

Source: What is the Enterprise plan?

Source: Rate limits (API)

↑ Back to top